
casmin
Membru-
Content count
88 -
Joined
-
Last visited
Posts posted by casmin
-
-
multumrsc foarte mult
-
Salutare,
Mi-am cumparat o alarma Maat 679 hands-free si as vrea sa o schema electrica pentru masina mea un V40, 1,9D 85kW, model 2001. si mai am o problema: alarma mi-a fost livrata fara manual de utilizare / programare si fara schema electrica. am reusit sa fac rost de ceva scheme electrice, dar nu sunt sigur ca sunt cele bune, asa ca daca ati avea o schema electrica si de la alarma v-as fi recunascator.
multumesc
-
piese gasesti chiar la www.piese-volvo.ro, adica la alex (midnight caller aici pe forum)...
-
scuze nu am citit atent....milioane de scuze....am sa fiu mai atent data viitoare....

-
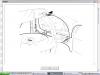
Cam asta scrie in VADIS (am atasat si pozele in ordinea numerelor):
Instruments
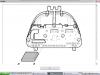
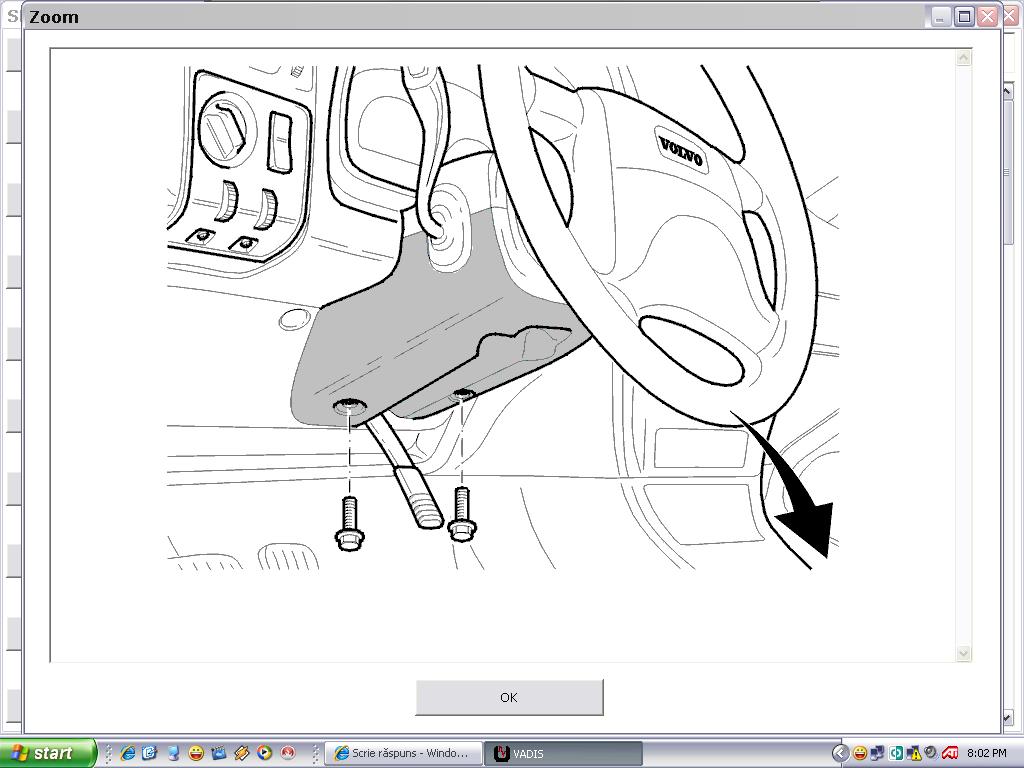
Combined instrument panel, removal
-Remove two bolts from the steering column mounting and lower column.
-Remove two self-tapping screws from trim edge and press edge downwards out of clips.
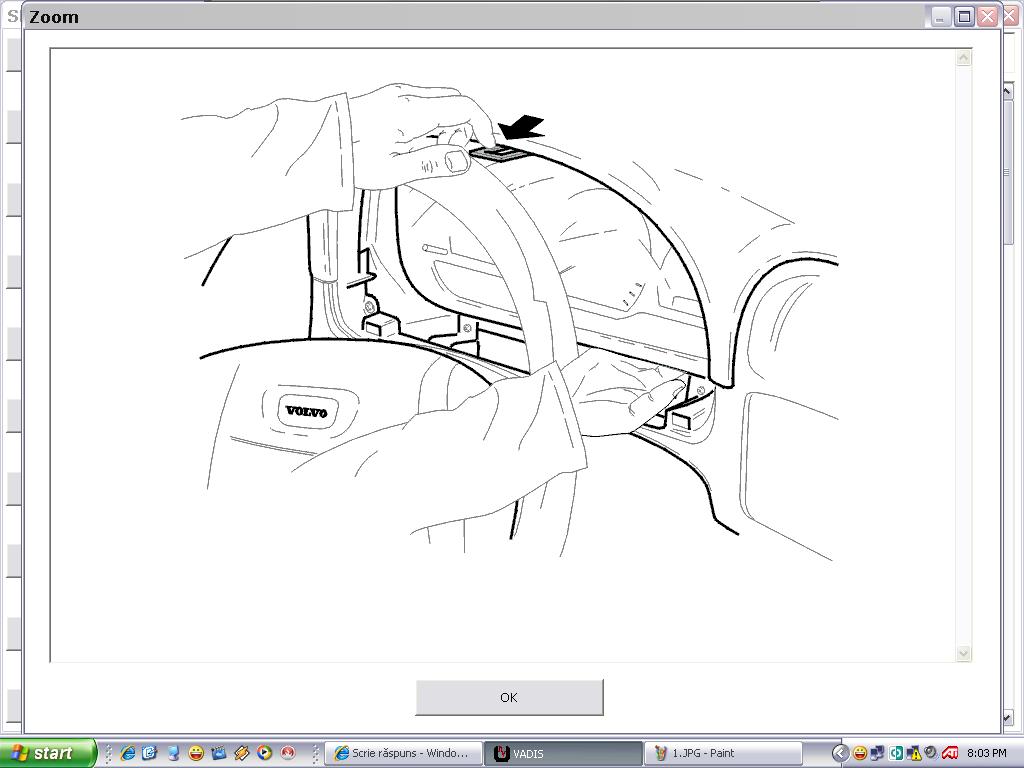
-Remove three self-tapping screws which hold combined instrument panel and remove it (connectors and cable are behind in dashboard).
Pull first straight outwards.
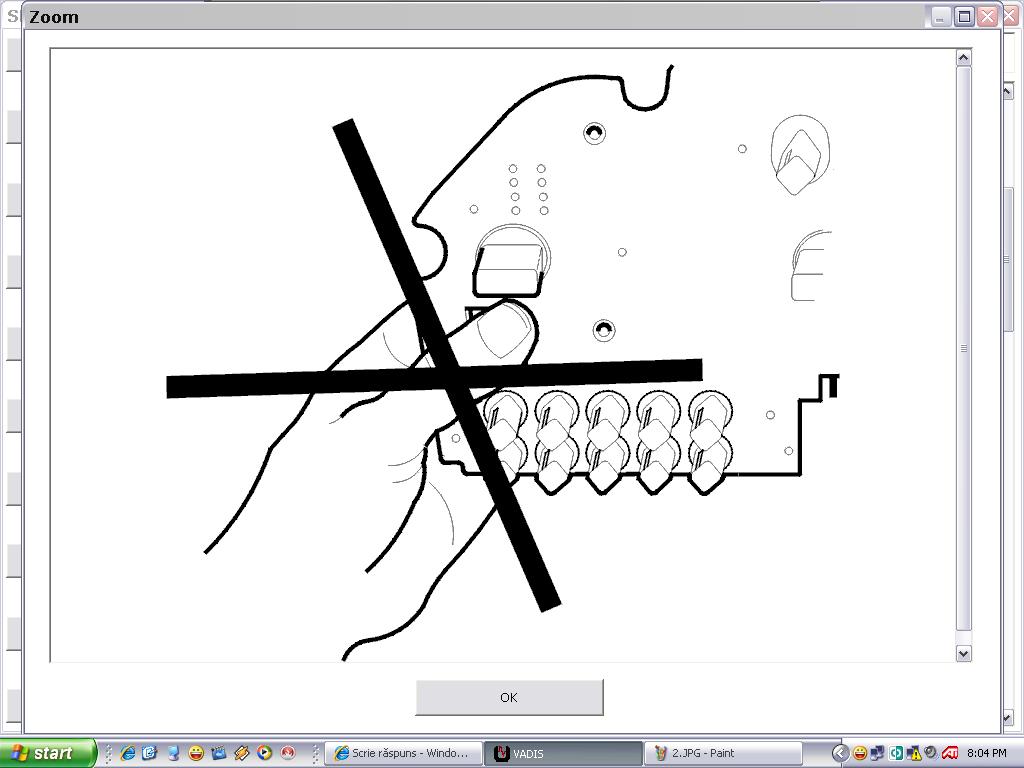
Note! During transportation and handling the combined instrument panel should never be held with the lens face down.
Combined instrument panel, replace components
When working on combined instrument panel, attention must be paid to the following:
Cleanliness: workplace must be free from dust, dirt, oil, solvents, etc.
• Always wash hands before removing combined instrument panel. After washing, do not use hand creams or lotions. If using protective gloves, they should be of thin cotton material. Synthetics can build up charges of static electricity.
• Circuit board must not be exposed to static electricity.
• Do not touch surfaces of circuit board or instrument face . Do not move pointers from set positions. These are factory set. If pointers are touched, the instrument may have to be replaced.
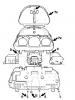
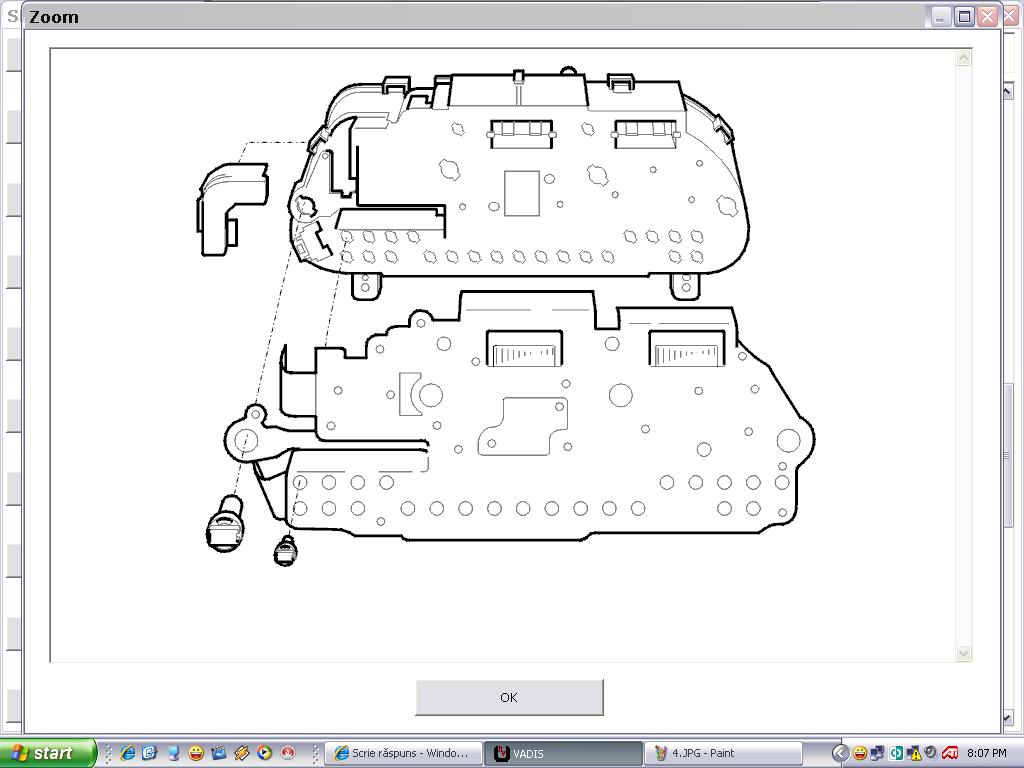
Combined instrument panel, removal
-Remove lens and black cover.
-Remove lower support.
-Press in clips (7) and remove cover with glass.
-Press in clips (7) and remove front.
-Remove temperature module (2 fixing screws).
-Remove foil cover on top left hand back side of combined instrument panel and carefully remove flex foil from connectors.
Note! Never remove screws of speedometer before removing black front cover while pushing up the speedometer will damage the small part of the front cover between speedometer and warning lens.
-Remove two self-tapping screws and bolt, and remove speedometer (different lengths of the screws)
-Remove four bolts and remove tachometer.
-Remove two bolts at front and remove temperature/ fuel gauge or trip computer.
-Carefully disconnect connector from flexible circuit board.
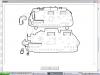
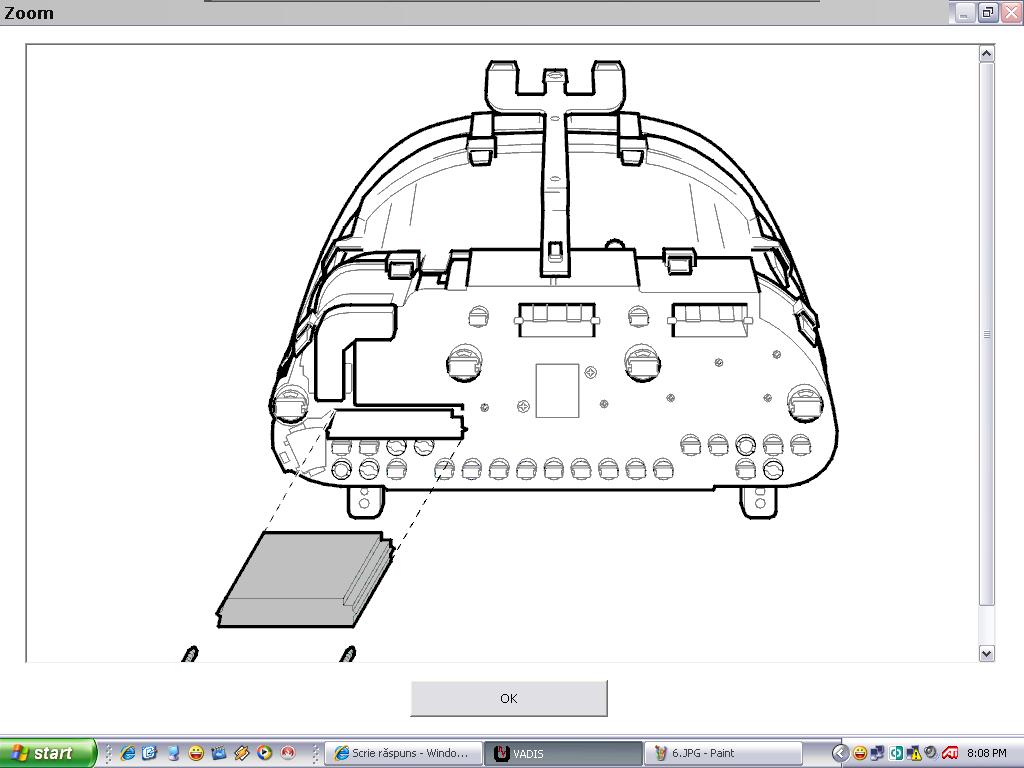
Circuit board, replacement
-Remove black cover at top left and disconnect connector.
-Remove temperature module (2 fixing screws).
-Remove lamps.
-Remove screws and bolts from speedometer and tachometer.
-Carefully remove circuit-board.
Take care that correct knobs are properly located in face.
Combined instrument panel symbol strip, replacement
Hint: Symbol strip is mounted on white housing and it is self-adhesive.
-Carefully remove the symbol strip.
-Adhesive on the top of the light box should be removed carefully.
-Never reinstall a symbol strip.
Temperature module, removal
-Install temperature module, screw down with 2 bolts and connect connector.
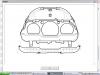
Combined instrument panel, installing
-Reinstall the combined instrument panel in reverse order.
-Install the front cover first and afterwards the lens.
Note! Special care should be taken with regards the following.
-When installing the front cover take care of the two small pins of the bottom side, those should fall into corresponding slots of the white housing.
-After installing the black front cover, the pins should be pressed a little to avoid any light leakage at the bottom side of the speedometer.
Note! This should be done with help of a soft material (e.g. rubber or textile) but never with bare fingers.
Note! Check that connectors are correctly positioned.


-
vreau si eu doua sepci...adresa e aceeasi la care imi trimiteai si piesele....merci
-
super masina si foarte bine dotata, dar o obiectie....husa aia pe volan nu vine bine deloc.....mi se pare tiganie....la masini ca astea husele pe volan nu vin bine deloc....
-
ma bucur ca ti-a folosit
-
Cam asta scrie in VADIS:
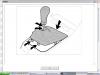
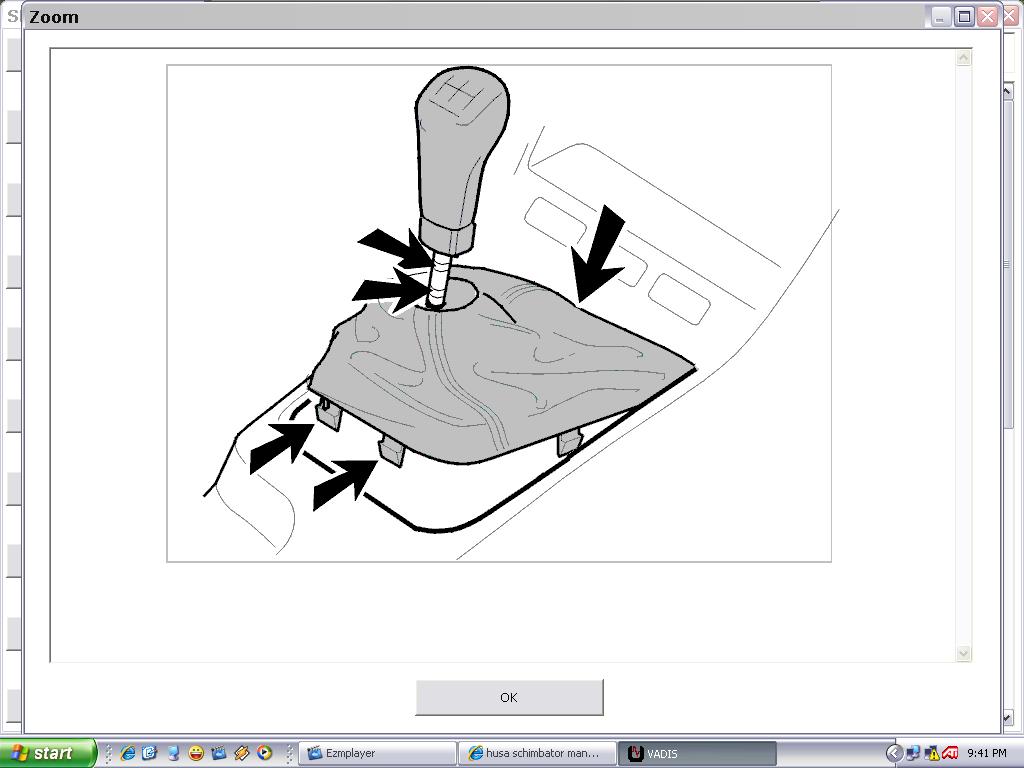
Replacing gear selector lever knob and boot
Special tools: 999 5685
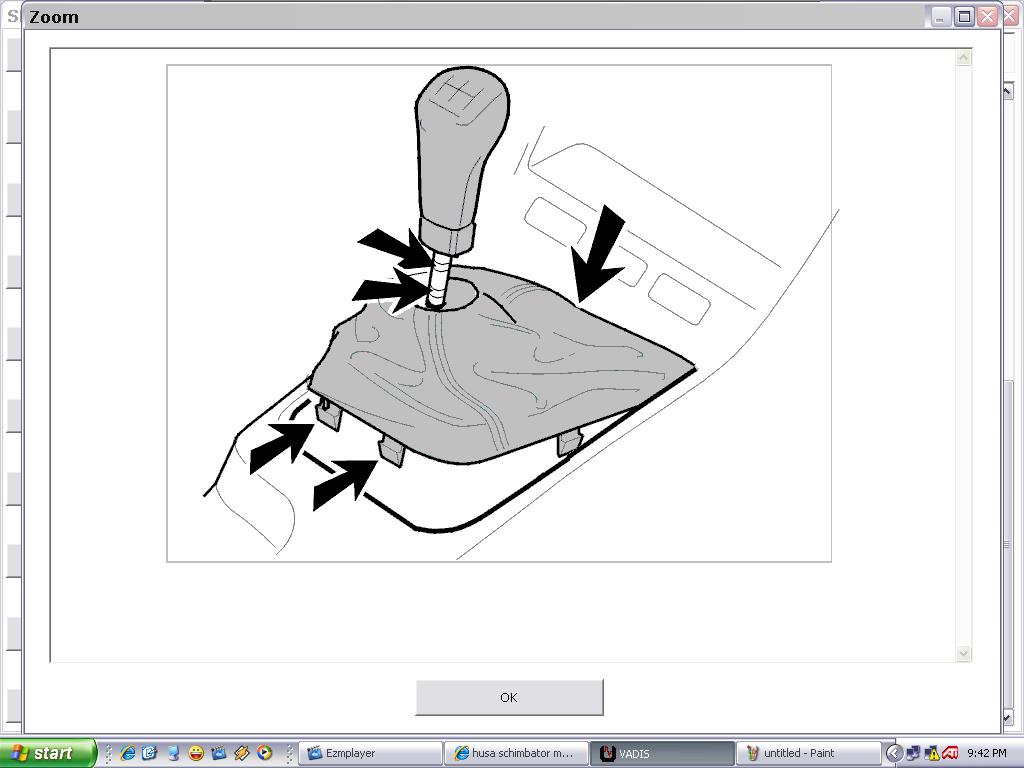
Remove boot from center console panel
Press the frame inside the boot in the rear edge and at the sides. Lift up the frame with boot from the panel.
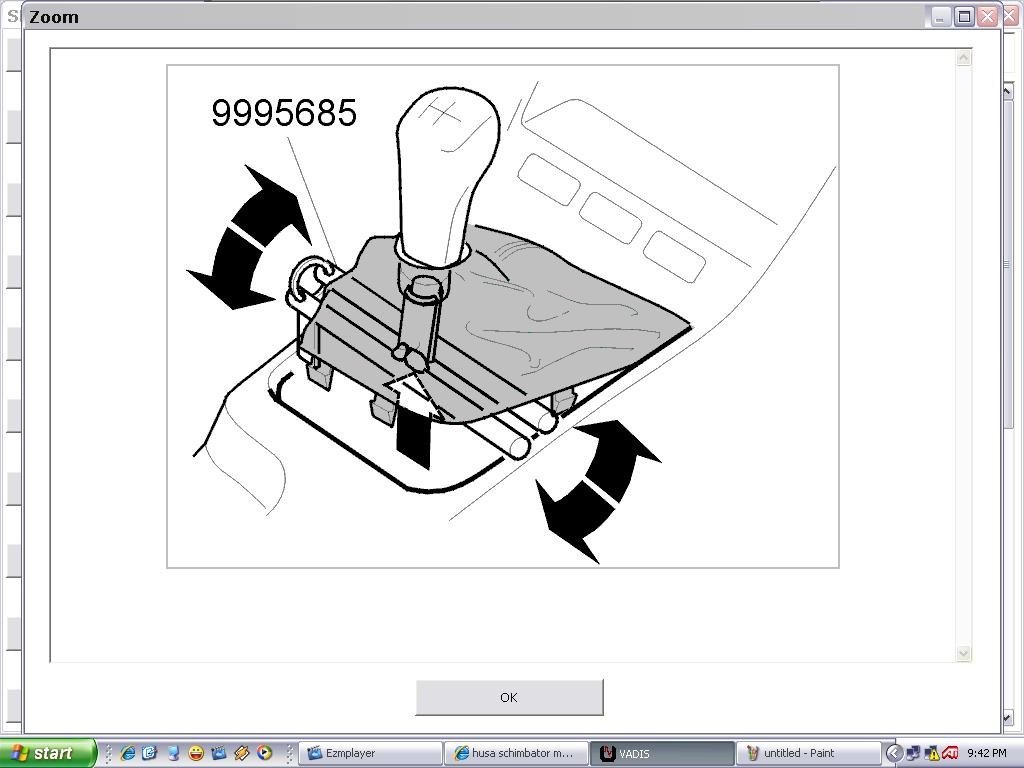
Slacken off boot from gear selector lever
Position drift 999 5685  under boot. Press the drift up, with a twisting movement, so that the lugs on the boot sleeve is released.
Depress boot and remove drift.
Remove gear selector knob
Position drift 999 5685  under gear selector knob. Press up the drift and twist in both directions so that the lugs on the knob are released. Pull off knob from drift.
Note! If the boot is to be replaced remove it from the gear selector lever. Use drift 999 5685 .
Position drift according to Slacken off boot from gear selector lever .
Install gear selector lever boot
Locate guide lug on the boot ring in the guide track on the lever.
Depress the ring to the lower lock groove.
Note! If the boot has not been replaced pull it up in its lock groove.
Secure the boot in the center console by first pressing the hooks into place on the front edge.
Then press the snap grips into place on the side and rear edges.
Install gear selector lever knob
Locate guide lug on the knob in the guide track on the gear selector lever. Press it into the lock groove.
cam asta scrie si sper sa-ti fie de ajutor....am atasat si pozele din VADIS....sa-ti fie mai usor


-
Salutare,
ce parere aveti de placutele de frana REMSA (made in spain)? cam cat de repede se consuma, fac sau nu negreala pe jenti...tocmai mi-am pus acest tip de placute pe spate si as vrea sa stiu daca am luat teapa sau nu....
-
am observat si eu ca nu prea ajuta mult proiectoarele, nici pe timp ploios sau cetos, dar am observat ca ma deranjeaza foarte mult cand merg noaptea si din fata imi vin masini cu proiectoarele aprinse (mai ales daca masina e logan)...asa ca am decis sa nu mai merg cu proiectoarele aprinse, afara de situatiile de extrema urgenta (si aici ma refer la drumuri cu gropi foarte multe si pe timp de noapte)
-
are cineva de vanzare un HU cu CD (nu conteaza daca are sau nu mp3) pentru un V40?
-
o sa incerc sa scot toate sigurantele si o sa le pun la loc sa vad ce-o sa fie....
-
Hristos a-nviat!
am si eu o problema cu ceasul din bord. intr-o dimineata cand m-am urcat in masina sa plec la munca am observat ca ceasul meu de la bord imi arata ora 10:30 am in loc de 7:00 am. totodata si kilometrajul cela care se reseteaza era si el la 0, desi seara dinainte arata vreo 874 de km, iar kilometrajul cela mare nu s-a modificat deloc. ce poate fi?
-
motor de renault, cutie de renault, sau mai stiu eu ce alte motoare si cutii fabricate de nu stiu ce alti producatori, dar sa inebunesc daca vreunul din acesti producatori se compara cu Volvo....calitatea materialelor si confortul pe care il ai in masina nu se compara cu niciun alt producator.....si aici ma refer la numai la V40 (pentru ca am eu) si in opinia mea e cea mai ieftina masina de la Volvo (sau ma rog era) si nu se compara cu niciun alt model de la niciun alt producator (vorbind de aceeasi categorie).....Volvo pune mare accent pe confort si mai ales pe siguranta pasagerilor si aici cred ca Volvo sunt cei mai tari.
-
dar motoarele diesel de 1.9 sunt tot de la renault? si alta intrebare: motoarele astea si cutiile sunt facute de renault sau de Volvo dupa licenta renault?
si zici ca acum sunt motoare de pegeout? de ce naiba nu au pus motoare de ford? sau si alea sunt tot de la pegeout?
-
si cum au ajuns sa faca masini cu motoare renault?....intreb si eu ca sa fiu la curent cu istoria S/V40....
-
pai si aceste componente sunt fabricate de aceeasi fabrica sau fiecare isi face componenta dupa aceleasi repere?
-
uite aici vezi, pe baza numarului de identificare al masinii, clasa de emisie a masinii tale:
-
din cate vad eu aici in VADIS, 1.9d din 2003 sunt euro 3.....
-
voua va place modelul actual de s40???
 ......mie mi se pare urat tare....mai frumos este modelul din 2001.....chiar nu aveti un pic de personalitate?....actualul model parca e un s60 mai mic, mai indesat si parca prea cocosat, de fapt umflat.....cel putin asa mi se pare mie......dar stiti cum e cu gusturile omului, nu poti sa te ... in ele.....hai sa nu ne mai contrazicem.....sa asteptam sa vorbim pe fapte, nu pe concepte...
  \
\ -
asta a crezut si mecanicul cand a auzit cum face, dar dupa ce a studiat problema mai amanuntit a descoperit ca e alt furtun.....sper sa fi vazut bine, ca nu prea am chef sa astept inca o saptamana dupa celalalt furtun.....ideea e ca eu am cam acelasi stil de mers cu accelerari bruste si vanjoase si in urma unei astfeli de accelerari s-a intamplat defectiunea.......
-
salutare,
azi dimineata in timp ce ma duceam la munca am auzit un zgomot, mai bine zis un fasait, in timp ce acceleram (mai exact, zgomotul este foarte asemator cu cel produs de aspirator cand incerci sa blochezi gura furtului de aspiratie cu mana). zgomotul era mai puternic cand apasam mai brusc pe acceleratie, apoi daca mentineam viteza zgomotul disparea. puterea motorului nu mai era aceeasi, dar nu aveam niciun bec aprins in bord. am fost cu ea la mecanic azi dupa-amiaza si mi-a spus ca este spart/crapat furtunul de recirculare gaze arse.
am facut comanda de acest furtun si sper sa fie numai asta si nu mai gaseasca altceva defect cand il inlocuieste.
-
arata mult mai bine decat modelul actual......


distributie la 1,9TD
in VOLVO S40/V40 (1996-2004)
Posted · Report post
Craciun fericit la toata lumea si un an nou plin de impliniri!!!
Vreau sa schimb distributia (codul de motor D4192T3) si nu stiu exact ce ar trebui sa schimb. M-ar interesa cate role intinzatoare trebuie schimbate, daca trebuie schimbata si pompa de apa (si daca se schimba banuiesc ca trebuie schimbat si antigelul) si cam ce altceva mai trebuie schimbat, si nu in ultimul rand cam cat ar costa toata afacerea.
multumesc